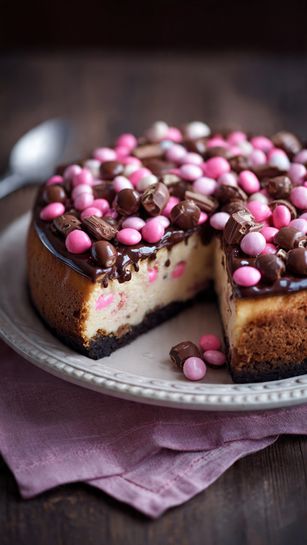
I love how this cheesecake takes a simple concept and turns it into something festive, sweet, and totally irresistible. The smooth chocolatey filling is loaded with creamy richness, and the chopped Snickers add pockets of caramel and crunch. The pink hue brings a fun, whimsical vibe—perfect for birthdays, Valentine’s Day, baby showers, or any moment that needs a little extra sparkle.
Ingredients
(Here’s a tip: Check out the full list of ingredients and measurements in the recipe card below.)
Base: → 1½ cups graham cracker crumbs or crushed Oreos → ⅓ cup unsalted butter, melted
Filling: → 3 packages (8 oz each) cream cheese, softened → 1 cup powdered sugar → 1 teaspoon vanilla extract → ½ cup heavy cream → 2 cups semi-sweet chocolate chips, melted and cooled → 1 cup Snickers bars, chopped → Pink food coloring, gel or liquid
I start by crushing the graham crackers or Oreos until they’re fine and even. I mix the crumbs with melted butter and press the mixture into the bottom of a 9-inch springform pan, creating a firm, even base. I chill the crust in the fridge for about 30 minutes while I work on the filling.
In a small pan, I melt the semi-sweet chocolate chips over medium heat, stirring constantly until smooth. I set the chocolate aside to cool slightly.
In a large mixing bowl, I beat the softened cream cheese, powdered sugar, and vanilla extract with an electric mixer until the mixture is creamy and smooth.
I slowly blend in the melted chocolate, making sure it’s fully incorporated without overheating the cream cheese. Then I fold in the chopped Snickers pieces.
In a separate bowl, I whip the heavy cream until stiff peaks form. I transfer a small portion of the cheesecake filling into another bowl and mix in a few drops of pink food coloring. I gradually fold the pink portion back into the rest of the mixture, stirring gently to achieve a uniform pink tone.
Once everything is mixed, I fold the whipped cream into the pink cheesecake filling, being careful not to deflate the mixture.
I pour the filling over the chilled crust, smoothing out the top with a spatula. I cover the pan with plastic wrap and refrigerate for at least 4 hours, or until fully set.
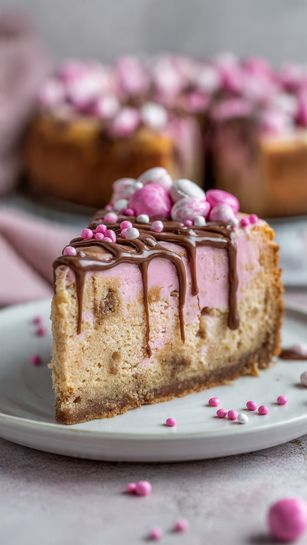
When the cheesecake is firm, I gently remove the sides of the springform pan. I top the cheesecake with whipped cream, M&Ms, and extra Snickers pieces for decoration.
Sometimes I switch up the crust by using chocolate graham crackers or even pretzels for a salty-sweet combo. I’ve also swapped the Snickers for Milky Way or Twix bars with great results. For a bolder look, I swirl different shades of pink into the cheesecake filling or tint the whipped cream topping to match.
Storage/Reheating
I store the cheesecake covered in the refrigerator for up to 5 days. It also freezes well—just skip the toppings and freeze slices individually in airtight containers. To serve, I thaw the slices in the fridge overnight and decorate them fresh.
FAQs
Can I make this cheesecake without food coloring?
Yes, I’ve skipped the food coloring before for a more classic chocolate-Snickers version. It tastes just as good—just without the pink flair.
How do I keep the filling from getting grainy?
I make sure the cream cheese is fully softened before mixing and that the melted chocolate is cooled slightly so it blends in smoothly.
Can I use a different candy instead of Snickers?
Definitely. I’ve made this with chopped Twix, Milky Way, and even peanut butter cups. Just pick your favorite and chop them into bite-sized pieces.
What’s the best way to slice a no-bake cheesecake?
I use a sharp knife dipped in hot water, then wipe it clean between each slice. It gives me clean, neat cuts every time.
Do I have to use a springform pan?
A springform pan makes removal and presentation easier, but I’ve also used a deep pie dish or a lined 9-inch cake pan. Just be extra gentle when serving.
Conclusion
This Pink M&M Snickers Cheesecake is the kind of dessert that makes everyone smile before the first bite. It’s rich, creamy, candy-packed, and full of personality—perfect for parties, holidays, or just for fun. I love how easy it is to customize and how stunning it looks on the table. One slice, and it’s celebration mode activated.


