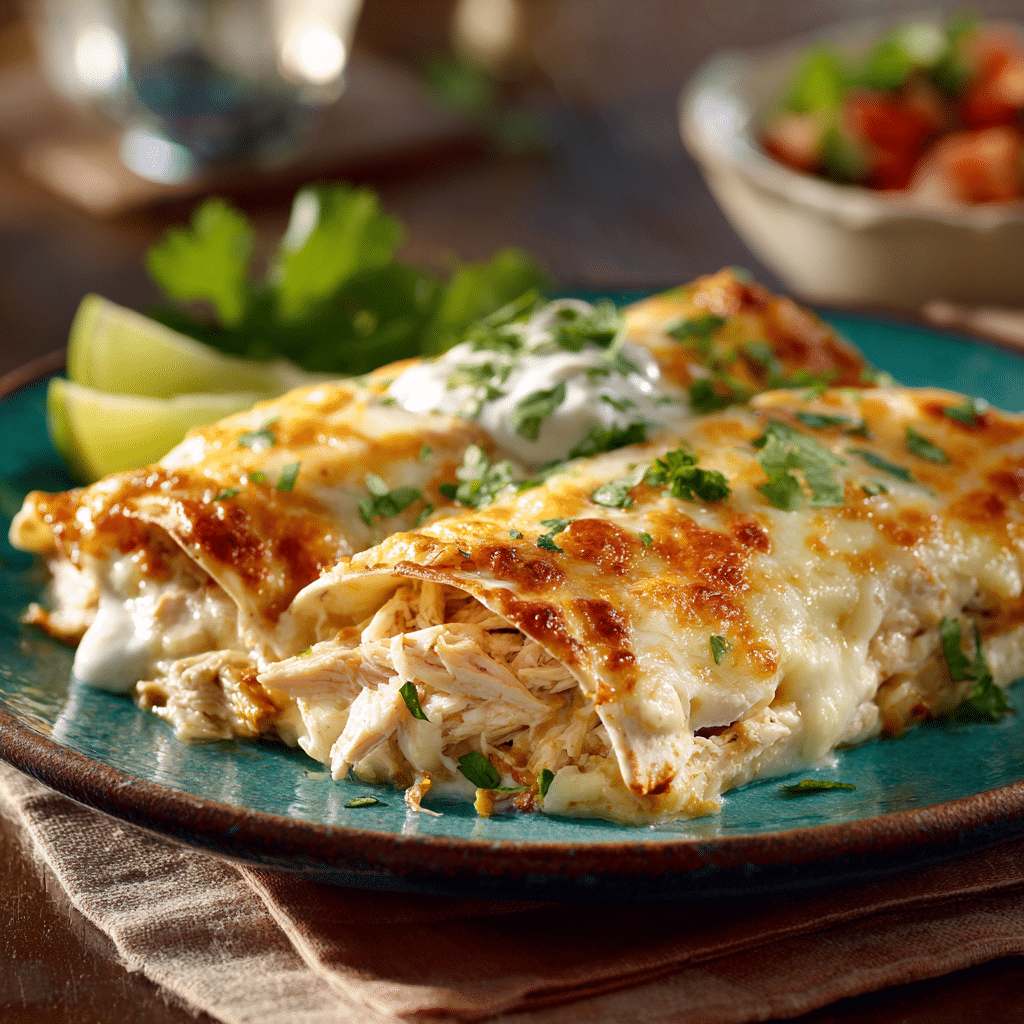
I Adore This Recipe Because It Balances Richness With Fresh Flavors. I Like How The Creamy Sauce Makes The Chicken Extra Moist, And The Baked Cheese On Top Gets Just Golden Enough To Be Irresistible. I Also Enjoy Adding Cherry Tomatoes And Fresh Herbs, Which Brighten The Dish And Make It Feel Special Even On A Weeknight.
Ingredients
(Her’s A Tip: Check Out The Full List Of Ingredients And Measurements In The Recipe Card Below.)
2 Cups Cooked Chicken Breast, Shredded 8 Small Flour Or Corn Tortillas 1½ Cups Shredded Mozzarella Or Monterey Jack Cheese ½ Cup Shredded Cheddar Cheese 1 Cup Enchilada Sauce (Mild Or Medium) ½ Cup Heavy Cream Or Cooking Cream 1 Teaspoon Ground Cumin ½ Teaspoon Smoked Paprika ½ Teaspoon Garlic Powder Salt And Black Pepper, To Taste 1 Cup Cherry Tomatoes, Halved 2 Tablespoons Olive Oil ¼ Cup Fresh Cilantro Or Parsley, Finely Chopped 1 Tablespoon Sesame Seeds Or Chili Flakes (Optional, For Garnish)
Directions
I Preheat My Oven To 375°F (190°C) While Preparing The Enchiladas.
In A Large Bowl, I Mix The Shredded Chicken With Cumin, Smoked Paprika, Garlic Powder, Salt, Pepper, And A Few Tablespoons Of Enchilada Sauce Until The Chicken Is Well Coated.
I Lay Out The Tortillas On A Clean Surface And Spoon The Seasoned Chicken Down The Center Of Each One. I Sprinkle Some Mozzarella Inside For Extra Creaminess, Then Roll The Tortillas Snugly.
I Lightly Grease A Baking Dish With Olive Oil And Arrange The Rolled Enchiladas Seam-Side Down.
In A Small Bowl, I Whisk Together The Remaining Enchilada Sauce And Cream Until Smooth, Then Pour It Evenly Over The Enchiladas.
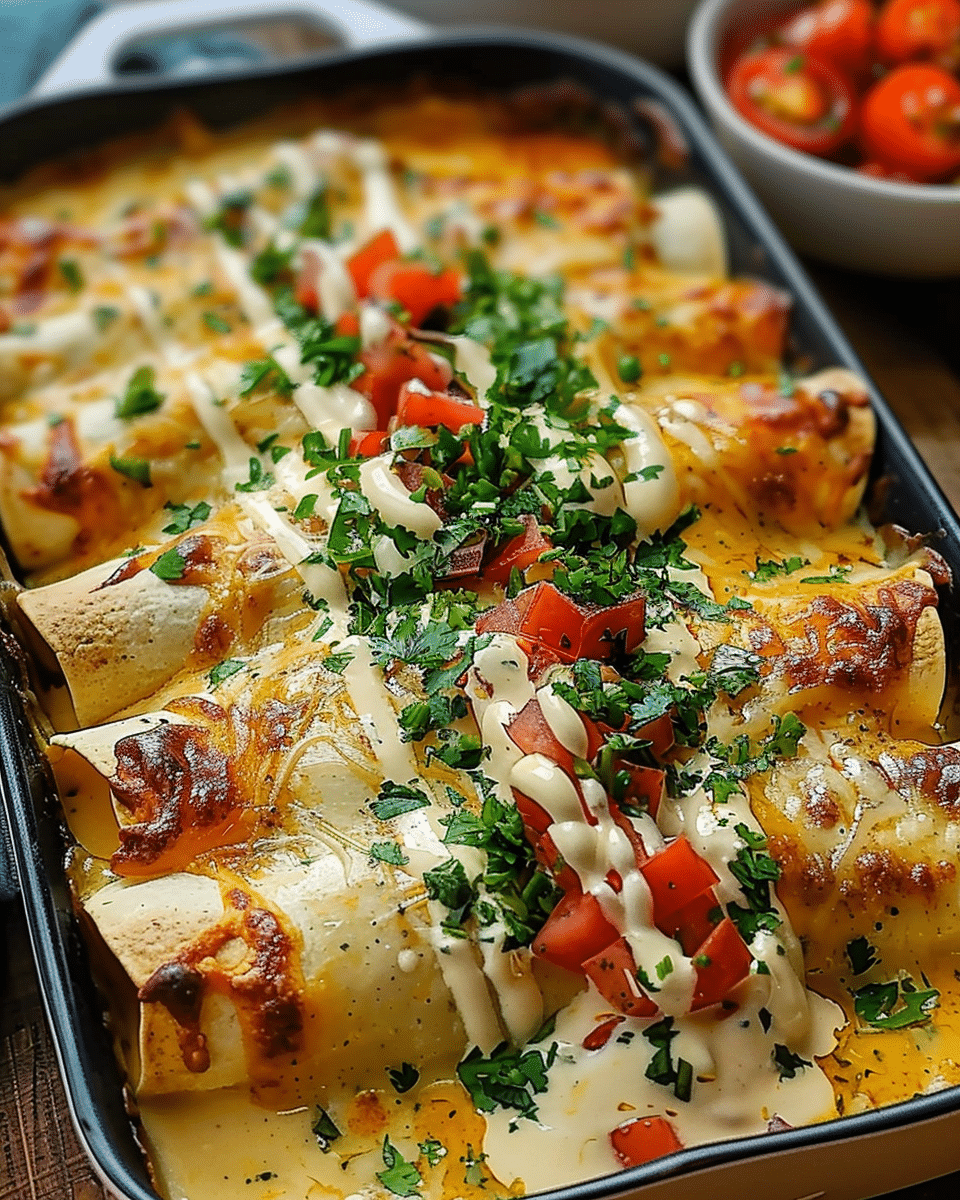
I Sprinkle The Rest Of The Mozzarella And Cheddar Cheese On Top And Scatter Cherry Tomatoes Across The Dish.
I Cover The Dish Loosely With Foil And Bake For 20 Minutes. Then I Remove The Foil And Bake For Another 10–15 Minutes Until The Cheese Is Fully Melted And Lightly Golden Around The Edges.
Once Out Of The Oven, I Finish With Fresh Herbs And A Sprinkle Of Sesame Seeds Or Chili Flakes If Desired.
I Serve The Enchiladas Straight From The Baking Dish While Still Bubbling, Sometimes With A Simple Green Salad Or A Spoonful Of Rice On The Side.
Servings And Timing
This Recipe Makes 4 Servings. Prep Time Is About 15 Minutes, Cooking Time Takes 35 Minutes, For A Total Of 50 Minutes.
Variations
I Sometimes Swap Cheddar For Pepper Jack Cheese For A Slightly Spicy Kick. I Also Enjoy Adding Sautéed Bell Peppers Or Onions Into The Chicken Filling For Extra Flavor. For A Fresher Taste, I Occasionally Serve With Lime Wedges On The Side.
Storage/Reheating
I Store Leftover Enchiladas In An Airtight Container In The Refrigerator For Up To 3 Days. I Reheat Them In The Oven Or Air Fryer To Keep The Cheese Melty And The Edges Slightly Crisp.
FAQs
Can I Use Rotisserie Chicken?
Yes, I Often Use Rotisserie Chicken To Save Time, And It Works Perfectly With This Recipe.
Can I Make These Ahead Of Time?
I Can Assemble The Enchiladas And Refrigerate Them For A Few Hours Before Baking, Which Makes Weeknight Cooking Even Easier.
Can I Use Corn Tortillas Instead Of Flour?
Absolutely! I Lightly Warm Corn Tortillas To Make Them Flexible Before Rolling.
Can I Make It Spicier?
Yes, I Add Chili Flakes, Jalapeños, Or Use A Spicy Enchilada Sauce For Extra Heat.
Can I Freeze These Enchiladas?
I Can Freeze Baked Enchiladas For Up To 2 Months. I Wrap Them Well And Reheat In The Oven When Ready To Serve.
Conclusion
I Always Find That Creamy Chicken & Cheese Enchiladas Are A Recipe I Come Back To Again And Again. They’re Easy Enough For A Weeknight, Comforting Enough For A Tough Day, And Delicious Enough To Share With Guests. I Love How The Creamy Sauce, Seasoned Chicken, And Bubbling Cheese Make Every Bite Feel Like Home.
Enjoy creamy chicken and cheese enchiladas with soft tortillas, shredded chicken, and bubbly melted cheese. Perfect for weeknight dinners or cozy meals with loved ones.
Author:Emma
Prep Time:15 minutes
Cook Time:35 minutes
Total Time:50 minutes
Yield:4 servings
Category:Dinner, Comfort Food
Method:Baking
Cuisine:Mexican-Inspired
Ingredients
2 cups cooked chicken breast, shredded
8 small flour or corn tortillas
1½ cups shredded mozzarella or Monterey Jack cheese
½ cup shredded cheddar cheese
1 cup enchilada sauce (mild or medium)
½ cup heavy cream or cooking cream
1 teaspoon ground cumin
½ teaspoon smoked paprika
½ teaspoon garlic powder
Salt and black pepper, to taste
1 cup cherry tomatoes, halved
2 tablespoons olive oil
¼ cup fresh cilantro or parsley, finely chopped
1 tablespoon sesame seeds or chili flakes (optional, for garnish)
Instructions
Preheat Oven
Preheat your oven to 375°F (190°C).
Season the Chicken
In a bowl, combine shredded chicken with cumin, smoked paprika, garlic powder, salt, pepper, and 2 tablespoons of enchilada sauce. Mix well.
Assemble Enchiladas
Lay out tortillas and spoon seasoned chicken down the center of each. Add a small sprinkle of mozzarella, then roll up tightly.
Prepare the Baking Dish
Lightly grease a baking dish with olive oil. Place the rolled tortillas seam-side down in the dish.
Make the Sauce
In a small bowl, mix the remaining enchilada sauce with heavy cream until smooth. Pour evenly over the tortillas.
Add Toppings
Sprinkle with remaining mozzarella and all of the cheddar cheese. Scatter cherry tomatoes on top.
Bake
Cover the dish loosely with foil. Bake for 20 minutes, then uncover and bake for another 10–15 minutes until the cheese is melted and golden.
Garnish & Serve
Top with chopped herbs and sesame seeds or chili flakes if desired. Serve warm with salad or rice.
Notes
For added spice, use medium or hot enchilada sauce.
Swap in rotisserie chicken for even faster prep.
You can make these ahead and refrigerate before baking.
Add sautéed onions or bell peppers for extra flavor.


