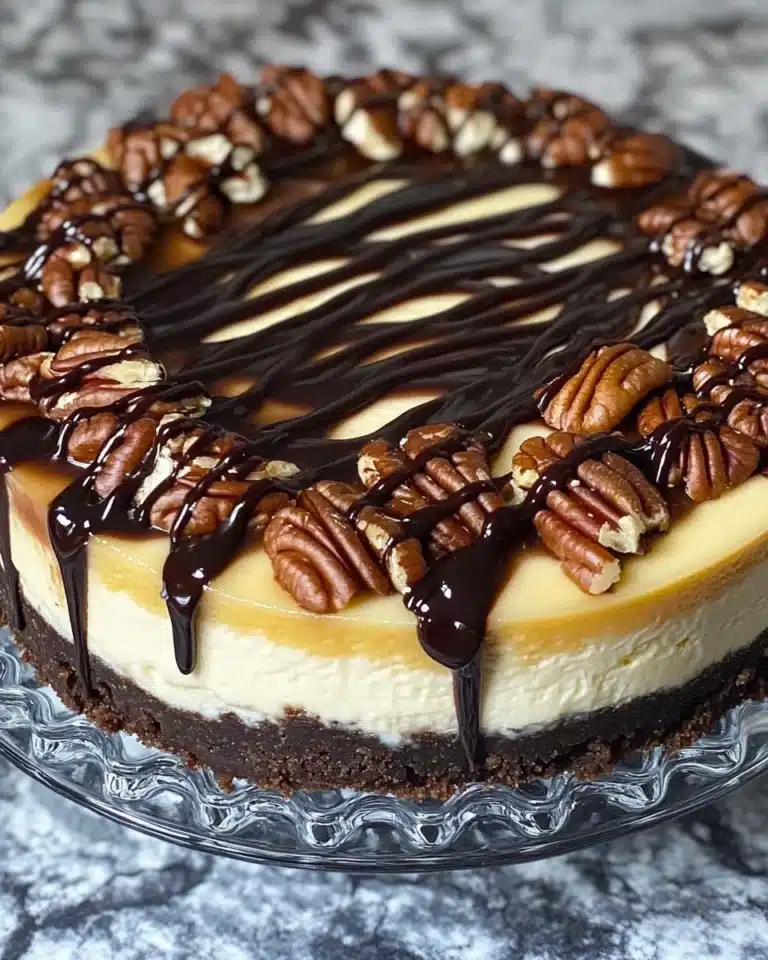
I’m genuinely excited to share this No-Bake Chocolate Biscuit Cake Recipe with you because it’s one of my absolute favorites when it comes to easy, decadent desserts. This cake brings together crunchy biscuits and toasted nuts enveloped in a rich, glossy chocolate syrup that melts in your mouth. What’s even better? It requires no baking, so it’s perfect when I want something indulgent but without the fuss. I love how the combination of textures and deep chocolate flavor always impresses everyone at the table, no matter the occasion.
Why You’ll Love This No-Bake Chocolate Biscuit Cake Recipe
What really makes this recipe stand out for me is the way it perfectly balances simplicity and flavor. The chocolate syrup is wonderfully silky and just the right amount of sweet and bitter, which coats the crunchy broken biscuits and toasted nuts beautifully. Each bite gives you this delightful contrast—soft, creamy chocolate paired with a satisfying crunch—which is honestly addictive. I always find myself coming back for seconds, and sometimes thirds.
Besides the incredible taste, the ease of preparation is something I truly appreciate. There’s no oven involved, so I can whip this up even on busy days or last-minute gatherings, and it feels so rewarding to have a homemade cake that sets in the fridge while I go about my day. It’s an excellent dessert for holidays, family dinners, or even informal parties because it looks impressive without needing fancy skills or complicated ingredients. I love serving it chilled, making it a refreshing treat that everyone enjoys, no matter the season.
Ingredients You’ll Need

Gathering these simple but essential ingredients is the first step toward creating this delicious No-Bake Chocolate Biscuit Cake Recipe. Each one plays a vital role in building that perfect combination of flavor, texture, and color that I adore about this dessert.
- Digestive or tea biscuits (28 oz / 800g): They provide the crunchy base and absorb the chocolate syrup beautifully without getting soggy.
- Nuts like walnuts or hazelnuts (1 cup / 100g): Toasted for extra crunch and a toasty depth of flavor that complements the chocolate.
- Sugar (1 cup / 200g): Adds necessary sweetness and caramelizes slightly in the syrup for richness.
- Unsweetened cocoa powder (1/2 cup / 60g): Gives the cake its intense chocolate flavor without overpowering.
- Water (1 cup / 240 ml): Helps dissolve the sugar and cocoa to create the perfect syrup texture.
- Butter (2/3 cup / 150g): Adds richness and helps the syrup set beautifully.
- Vanilla extract (1 tsp): Brings out all the chocolatey goodness with a warm, aromatic touch.
- Whipping cream (1/2 cup / 120g with 35% fat): Used to create the luscious ganache topping.
- Bittersweet chocolate, chopped (4 oz / 120g): For the silky ganache glaze that completes the cake.
Directions
Step 1: Start by breaking the digestive biscuits into small pieces in a large mixing bowl—try not to make them too fine as I like having visible crunchy bites in the cake.
Step 2: Heat a non-stick pan over medium-high heat and toast your nuts (walnuts or hazelnuts) for around 5 minutes. Keep stirring frequently so they toast evenly and develop that irresistible nutty aroma. Once toasted, add them to the bowl with the broken biscuits.
Step 3: To make the chocolate syrup, combine sugar and cocoa powder in a medium saucepan, stirring to blend well. Gradually add water while stirring continuously to avoid lumps. Then add the butter and place the pan over medium heat. Bring the mixture to a boil and let it simmer for 7 to 8 minutes, stirring constantly to ensure it doesn’t stick or burn.
Step 4: Remove the pan from heat and stir in the vanilla extract. Let this chocolate syrup cool slightly for 10 to 15 minutes—this ensures it’s not too hot when you pour it over the biscuits and nuts, so they maintain some crunch.
Step 5: Pour the cooled syrup over the biscuit and nut mixture, combining everything well with a large spatula or spoon. Make sure all biscuit pieces get coated in that luscious chocolate.
Step 6: Transfer the combined mixture into a 9-inch (23 cm) non-stick round cake pan or a springform pan lined with parchment paper at the bottom for easy removal.
Step 7: Press the mixture firmly into the pan using the back of the spoon or an offset spatula, compacting it well so the cake holds together nicely once it’s chilled.
Step 8: Cover the cake and refrigerate it for 30 minutes to 1 hour to let the base set while you prepare the ganache.
Step 9: For the ganache, heat the whipping cream in a small saucepan until it just starts to boil. Immediately pour it over the chopped bittersweet chocolate and let it sit for 1 minute; then stir gently until smooth and glossy.
Step 10: Pour the ganache evenly over the chilled cake base and refrigerate again to set for 3 to 4 hours or, even better, overnight. This step really lets the flavors meld and ensures a beautiful firm but soft finish.
Step 11: Just before serving, decorate the top with some extra toasted nuts if you like, then slice into portions and enjoy the irresistible layers of chocolatey crunch!
Servings and Timing
This No-Bake Chocolate Biscuit Cake Recipe yields about 10 generous servings—ideal for a group of family or friends who appreciate a rich dessert. Preparing the cake base, including toasting and mixing, takes roughly 15–20 minutes, while cooking the syrup and ganache adds another 10–15 minutes. The most important part is allowing adequate chilling time: at least 30 minutes for the base to set and 3 to 4 hours (preferably overnight) for the ganache to firm up properly. In total, you’re looking at around 4 hours of resting time, but the active hands-on cooking time is under half an hour, which I love.
How to Serve This No-Bake Chocolate Biscuit Cake Recipe

When it comes to serving this cake, I like to let it sit at room temperature for about 10 minutes before slicing so it isn’t too cold and firm. This little tip really helps bring out the full flavors and makes each slice creamier and more enjoyable. I usually cut it into wedge-shaped slices that highlight the crunchy biscuit layers and glossy ganache top beautifully.
For accompaniments, this cake pairs wonderfully with fresh berries like raspberries or strawberries, whose tartness contrasts nicely with the rich chocolate. If you want to go a step further, a dollop of lightly whipped cream or a scoop of vanilla ice cream next to each slice is heavenly. Garnishing with a sprinkle of chopped toasted nuts or even a dusting of cocoa powder can elevate presentation and add texture.
As for drinks, I often recommend pairing it with a robust red wine such as a Cabernet Sauvignon, or for something non-alcoholic, a cup of freshly brewed coffee or rich hot chocolate complements the dessert perfectly. This cake is a showstopper for holidays, birthday parties, or any celebratory dinner when I want to impress without too much effort.
Variations
One of the best things about this recipe is how flexible it is. If you’d like to switch things up, try using gluten-free biscuits instead of digestive biscuits to make it suitable for gluten intolerance without losing that satisfying crunch. For a vegan twist, I’ve experimented with coconut oil in place of butter and used a dairy-free cream alternative for the ganache, which works surprisingly well, maintaining the richness.
If you want to enhance the flavor profile, I often add a pinch of cinnamon or espresso powder into the chocolate syrup—these subtle additions deepen the complexity and make the cake even more irresistible. You could also fold in dried fruit like chopped apricots or cherries along with the nuts for bursts of chewy sweetness.
For a slightly different texture, instead of chopping the biscuits into small pieces, you can pulse them in a food processor until coarse crumbs form and then follow the same process. It will give you a more uniform, fudge-like consistency that I sometimes prefer for a denser bar-style cake.
Storage and Reheating
Storing Leftovers
I always keep leftover No-Bake Chocolate Biscuit Cake stored in an airtight container in the refrigerator. It stays fresh and delicious for up to 4 days, which means you can enjoy a treat across several days without it drying out. Make sure to cover it well to prevent the cake from absorbing any other fridge odors, and keep it on a lower shelf for consistent temperature.
Freezing
This cake freezes beautifully if you want to prepare it ahead of time for special events. To freeze, wrap the whole cake tightly in plastic wrap and then place it in a freezer-safe container or resealable bag. It keeps well frozen for up to 2 months. When you’re ready to enjoy it, thaw it in the fridge overnight and then let it come to room temperature for about 30 minutes before serving for the best texture.
Reheating
I generally don’t recommend reheating this dessert since it’s best enjoyed chilled or at room temperature. Reheating can cause the ganache to separate or the biscuit base to lose its crunch. Instead, simply allow it to sit outside the fridge a while if it’s too cold, or serve it alongside a warm beverage to balance the temperature contrast perfectly.
FAQs
Can I use different types of biscuits for this cake?
Absolutely! While digestive biscuits provide the perfect texture and mild sweetness, you can substitute tea biscuits, graham crackers, or even ladyfingers. Just make sure they’re sturdy enough to hold up in the syrup without turning watery.
Is it possible to make this cake nut-free?
Yes, if you have a nut allergy or prefer to avoid nuts, simply omit them or replace with seeds like pumpkin or sunflower seeds for crunch. You could also add dried fruit to compensate for texture.
How long does the cake need to chill before serving?
To get the best results, refrigerate the base for at least 30 minutes before adding the ganache. After pouring the ganache, chill for at least 3 to 4 hours or ideally overnight to allow the flavors to meld and the cake to set properly.
Can I make this cake ahead of time for a party?
Definitely! This cake is wonderful for making a day or two in advance because the flavors develop beautifully as it chills. Just keep it covered in the fridge until you’re ready to serve.
What’s the best way to cut and serve the cake?
Use a sharp knife dipped in hot water and wiped dry between cuts for clean slices. Letting the cake sit at room temperature for 10 minutes before cutting makes slicing easier and prevents cracking.
Conclusion
I hope you’re as excited as I am to try this No-Bake Chocolate Biscuit Cake Recipe. It’s a true joy to make, combining simple ingredients into a dessert that always impresses without needing a lot of time or fuss. Whether you’re celebrating a special occasion or just want to treat yourself, this cake will quickly become a favorite go-to in your recipe collection. Happy baking, or rather, no-baking!
PrintNo-Bake Chocolate Biscuit Cake Recipe

This No-Bake Chocolate Biscuit Cake combines crunchy digestive biscuits and toasted nuts with a rich homemade chocolate syrup and silky ganache topping. It’s an easy, no-bake dessert that sets in the refrigerator, making it perfect for a quick yet impressive chocolate treat.
- Prep Time: 15 minutes
- Cook Time: 15 minutes
- Total Time: 4 hours 30 minutes (includes chilling time)
- Yield: 10 servings
- Category: Dessert
- Method: Stovetop
- Cuisine: British
Ingredients
Dry Ingredients
- 28 oz (800g) digestive biscuits (tea biscuits)
- 1 cup (100g) nuts (walnuts or hazelnuts)
- 1 cup (200g) sugar
- 1/2 cup (60g) unsweetened cocoa powder
Wet Ingredients
- 1 cup (240 ml) water
- 2/3 cup (150g) butter
- 1 tsp vanilla extract
- 1/2 cup (120g) whipping cream (35% fat)
- 4 oz (120g) bittersweet chocolate, chopped
Instructions
- Break biscuits: Break the digestive biscuits into small, bite-sized pieces and place them into a large mixing bowl.
- Toast nuts: Heat a non-stick pan over medium-high heat, then add walnuts or hazelnuts. Toast for about 5 minutes, stirring frequently to ensure even toasting. Once toasted, add the nuts to the bowl with the biscuit pieces.
- Make chocolate syrup: In a medium saucepan, combine sugar and cocoa powder. Stir well to mix, then gradually add water while stirring to form a smooth mixture. Add butter and place the pan over medium heat. Bring the mixture to a boil, stirring constantly for 7-8 minutes until smooth and glossy. Remove from heat and add vanilla extract. Allow the syrup to cool slightly for 10-15 minutes.
- Combine syrup with biscuits and nuts: Pour the chocolate syrup over the biscuit and nut mixture. Using a large spatula or spoon, mix thoroughly to coat all the pieces evenly.
- Transfer to cake pan: Spoon the mixture into a 9-inch (23 cm) non-stick round cake pan or springform pan lined with parchment paper. Press down firmly using the back of a spoon or an offset spatula to compact the mixture.
- Refrigerate to set: Cover the pan and refrigerate for 30 minutes to 1 hour to allow the cake base to firm up before adding the ganache.
- Prepare chocolate ganache: In a small saucepan, heat the whipping cream until it just begins to boil. Remove from heat and pour the hot cream over the chopped bittersweet chocolate. Let it sit for 1 minute, then stir until the ganache is smooth and glossy.
- Pour ganache over cake: Pour the prepared ganache evenly over the set biscuit cake base.
- Chill to set ganache: Refrigerate the cake for 3 to 4 hours, or ideally overnight, to allow the ganache to firm up completely.
- Decorate and serve: Optionally, decorate the top with toasted nuts. Cut into slices and serve chilled for a rich, satisfying dessert.
Notes
- Use digestive biscuits for best texture and flavor; tea biscuits work as a substitute.
- Toasting nuts enhances their flavor and adds crunch to the cake.
- Allow the chocolate syrup to cool slightly before mixing to prevent melting the biscuits excessively.
- The cake sets best if refrigerated overnight but can be served after 3-4 hours chilling.
- Store leftovers in the refrigerator, covered, for up to 5 days.