Why You’ll Love This Recipe
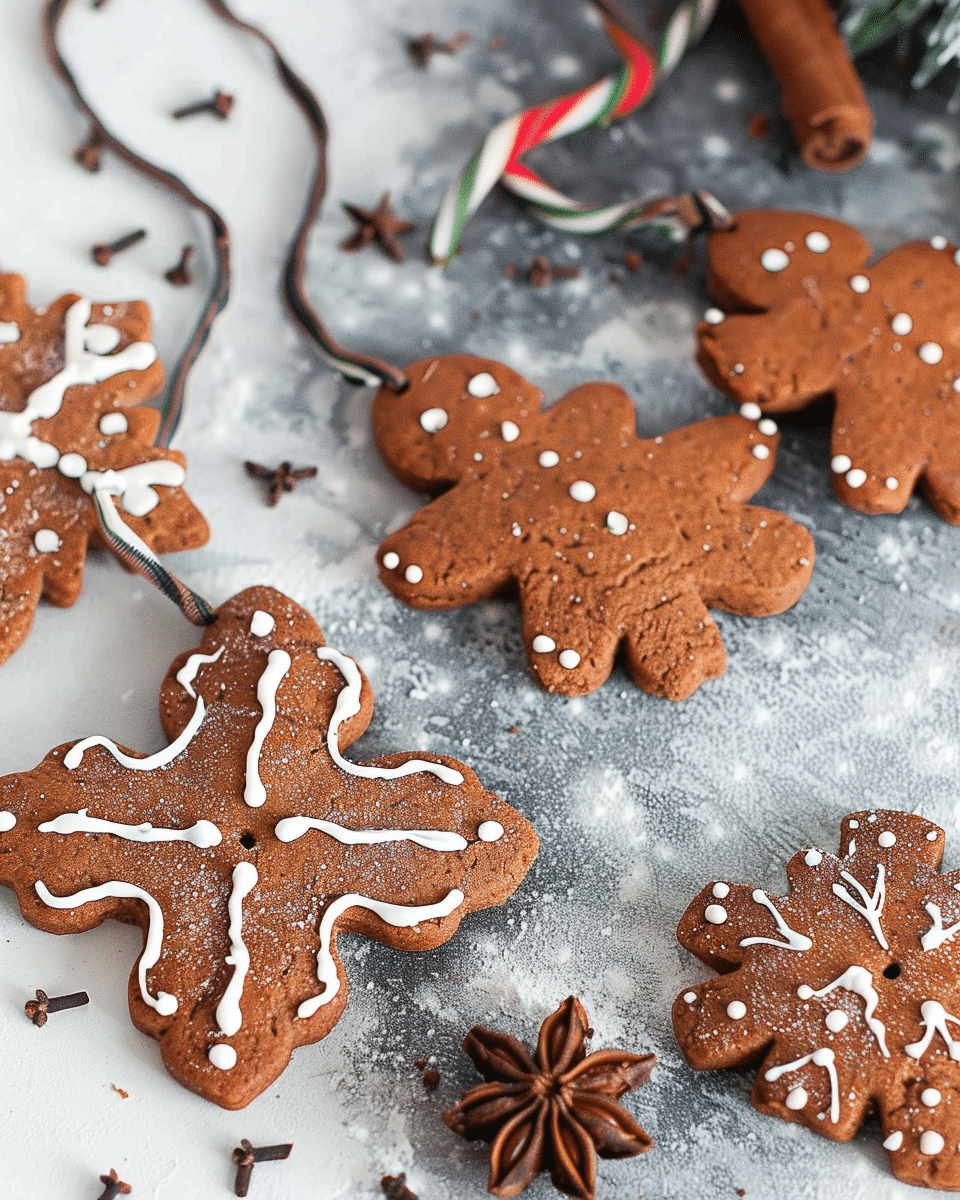
I really enjoy making these cinnamon ornaments because they’re low-cost, easy, and fun for both kids and adults. The dough is soft and pliable, making it easy to roll and cut into festive shapes. I also love how they make the house smell like the holidays while they bake. Once dry, they last for years if stored well—and each one becomes a sweet little memory from the season.

Ingredients
(Here’s a tip: Check out the full list of ingredients and measurements in the recipe card below.)
1 cup ground cinnamon
1 tablespoon ground nutmeg
1 tablespoon ground cloves
½ cup white all-purpose glue
¾ cup applesauce
Directions
-
I preheat the oven to 200°F (93°C) and line a baking sheet with parchment paper.
-
In a medium mixing bowl, I combine the cinnamon, nutmeg, and cloves using a whisk or wooden spoon.
-
I add in the applesauce and glue, mixing everything by hand until it forms a smooth, clay-like dough.
-
I roll the dough out to about ¼-inch thick, using a rolling pin.
-
I cut out shapes using holiday cookie cutters—like stars, trees, or gingerbread men—and carefully transfer them to the baking sheet with a spatula.
-
I poke holes near the top of each ornament using a straw or toothpick—this is where I’ll thread the ribbon later.
-
I decorate the ornaments with any oven-safe decorations I want to bake into the surface.
-
I bake them at 200°F for 2 to 3 hours until they’re dry and hardened.
-
Once cool, I thread ribbon through the holes and hang them up or attach them to gifts. If I want to decorate further, I use paint, glue, glitter, or metallic markers after they’ve cooled.
Servings and timing
This recipe yields about 30 ornaments. It takes around 20 minutes to prepare and about 2–3 hours to bake, for a total of about 2 hours and 40 minutes. If I choose to air-dry them instead, it takes about 2 to 3 days.
Variations
I sometimes press patterns into the dough using stamps or a textured rolling pin before cutting out the shapes. If I want to skip the baking, I let the ornaments air dry on a wire rack, rotating them every now and then for even drying. For a little shimmer, I’ve added gold glitter or painted the edges with metallic paint once they’re dry. I also like to write the year on the back with a Sharpie for a personalized touch.
Storage/Reheating
I store my finished cinnamon ornaments in an airtight container or zip-top bag in a cool, dry place. I separate them with tissue paper or bubble wrap to prevent chipping. These aren’t edible, so I keep them labeled and out of reach from small kids or pets. They don’t need reheating or refreshing—just take them out each year and enjoy their long-lasting scent and charm.
FAQs
Can I make these without glue?
The glue helps bind the dough and gives the ornaments a firmer, longer-lasting texture. I don’t recommend skipping it if I want the ornaments to hold up well over time.
How long do these cinnamon ornaments last?
Mine have lasted for years when stored properly. I keep them dry and wrapped up gently during the off-season, and they still smell great year after year.
Can I air-dry the ornaments instead of baking?
Yes, I sometimes air-dry them by placing them on a wire rack for 2–3 days. I rotate them occasionally so they dry evenly on both sides.
Can kids help make these ornaments?
Absolutely. This is one of my favorite crafts to do with kids. I handle the baking, but they love mixing, rolling, cutting, and decorating.
Are these ornaments edible?
No, these are for decoration only. Even though the ingredients are mostly pantry staples, the glue makes them inedible.

Conclusion
These Cinnamon Ornaments are a simple, nostalgic holiday craft that I love making every year. They’re easy, fun, and fill my home with the cozy scent of cinnamon while baking. Whether I’m decorating the tree, adding a handmade touch to gift wrap, or crafting with my family, these ornaments are always a joyful part of the season.
PrintCinnamon Ornaments
These classic cinnamon ornaments are a festive holiday craft that fills your home with warm spice scents. Made with applesauce, glue, and spices—easy to bake, customize, and perfect for DIY gifts or tree decorations!
- Prep Time: 20 minutes
- Cook Time: 2 hours
- Total Time: 2 hours 40 minutes
- Yield: 30 ornaments
- Category: Crafts, Holiday, DIY
- Method: Oven-Baked or Air-Dried
- Cuisine: Holiday Craft (Non-Food)
Ingredients
1 cup ground cinnamon
1 tablespoon ground nutmeg
1 tablespoon ground cloves
½ cup white all-purpose glue
¾ cup applesauce
Instructions
Preheat oven to 200°F (93°C). Line a baking sheet with parchment paper.
Mix dry ingredients: In a medium bowl, whisk together cinnamon, nutmeg, and cloves.
Add wet ingredients: Stir in applesauce and glue. Mix by hand until a smooth, clay-like dough forms.
Roll dough: Roll out dough to about ¼-inch thickness.
Cut shapes: Use cookie cutters to cut out holiday shapes. Re-roll scraps as needed.
Transfer & poke holes: Lift cutouts with a spatula onto the baking sheet. Use a straw or toothpick to poke holes where string will go.
Decorate (optional): Decorate with oven-safe embellishments before baking.
Bake: Bake for 2–3 hours or until ornaments are dry and hard.
Cool & decorate: Let cool. Tie with ribbon, or decorate with paint, glitter, or markers.
Notes
Not edible: These ornaments are for decorative use only.
Air-dry option: You can air-dry the ornaments for 2–3 days instead of baking.
Smoothing tip: Use fine-grit sandpaper to smooth rough edges after baking.
Personalize: Use a Sharpie to write the year or names on the back.
Less mess tip: Roll dough between sheets of plastic wrap for easier cleanup.


