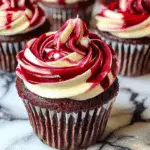
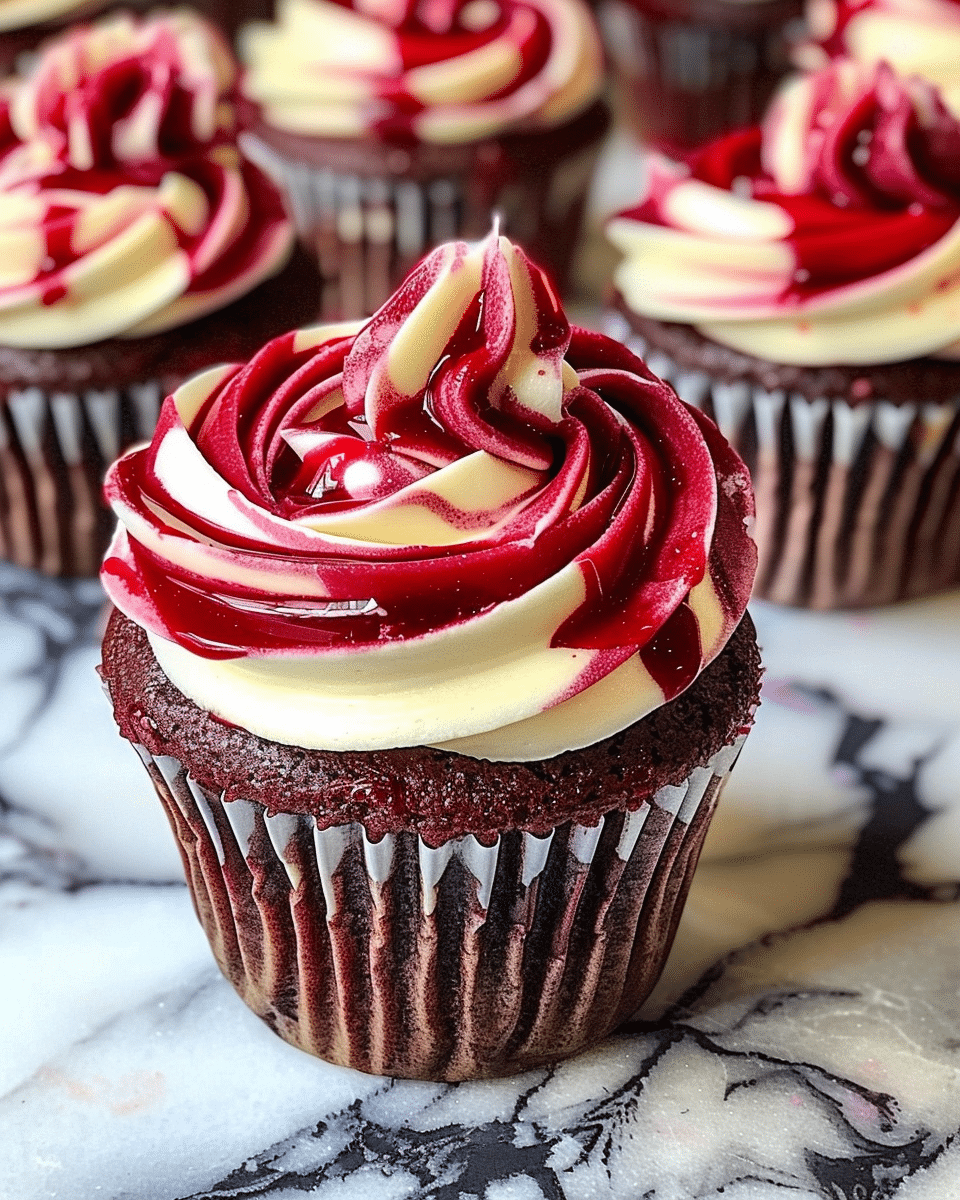
These red velvet marble cupcakes are a beautiful and delicious twist on a classic treat. I love how the swirl of red velvet and vanilla cake creates a stunning marbled effect, while the soft, moist texture makes them perfect for any occasion.
Why You’ll Love This Recipe
I like this recipe because it combines the best of both worlds—rich, slightly tangy red velvet and light, fluffy vanilla cake. The cupcakes are eye-catching without being complicated, and they taste just as good as they look. I enjoy topping them with cream cheese frosting, which complements both flavors perfectly.
Ingredients
(Here’s a tip: Check out the full list of ingredients and measurements in the recipe card below.)
-
all-purpose flour
-
cocoa powder
-
baking powder
-
baking soda
-
salt
-
butter
-
sugar
-
eggs
-
vanilla extract
-
buttermilk
-
red food coloring
-
vinegar
-
cream cheese (for frosting)
-
powdered sugar (for frosting)
Directions
-
I preheat my oven to 350°F (175°C) and line a muffin tin with cupcake liners.
-
I whisk together flour, cocoa powder, baking powder, baking soda, and salt.
-
In a separate bowl, I cream butter and sugar until fluffy, then beat in the eggs and vanilla.
-
I mix in the dry ingredients alternately with buttermilk, dividing the batter in half.
-
To one half, I add red food coloring, a little cocoa, and vinegar to create the red velvet portion.
-
I spoon the batters into cupcake liners, alternating red and plain, then swirl lightly with a toothpick for the marble effect.
-
I bake for 18–20 minutes, until a toothpick inserted in the center comes out clean.
-
I let the cupcakes cool completely before frosting with cream cheese frosting.
Servings and timing
This recipe makes about 12 cupcakes. Prep time takes me around 20 minutes, and baking is 20 minutes, so the cupcakes are ready in about 40 minutes (plus cooling and frosting time).
Variations
Sometimes I add chocolate chips to the batter for an extra indulgent touch. If I want more contrast, I use a stronger red food coloring or even swirl in chocolate batter instead of plain vanilla. For a festive twist, I top them with sprinkles or a drizzle of melted white chocolate.
storage/reheating
I keep frosted cupcakes in an airtight container in the refrigerator for up to 4 days. Before serving, I let them sit at room temperature for about 20 minutes to soften. If unfrosted, I store them at room temperature for 2 days or freeze for up to 2 months.
FAQs
Can I make these without food coloring?
Yes, I skip the coloring and keep them as chocolate marble cupcakes—they’re just as delicious.
What frosting pairs best with these?
I usually go with cream cheese frosting, but buttercream or whipped cream also work well.
Can I turn this recipe into a cake?
Yes, I bake the batter in an 8-inch pan, adjusting the baking time to 25–30 minutes.
How do I get a good marble effect?
I layer the two batters and swirl gently with a toothpick. I avoid overmixing so the colors stay distinct.
Can I make them ahead of time?
Yes, I bake the cupcakes a day ahead and frost them right before serving. They stay moist and taste even better after resting.
Conclusion
I love baking red velvet marble cupcakes because they’re fun, flavorful, and always a showstopper. The swirl of colors makes them look impressive, while the familiar taste of vanilla and red velvet keeps them comforting. They’re perfect for parties, holidays, or just when I want to treat myself to something beautiful and sweet.
PrintRed Velvet Marble Cupcakes
These red velvet marble cupcakes combine the rich, tangy flavor of red velvet with light, fluffy vanilla cake, swirled together for a stunning marbled effect and topped with cream cheese frosting.
- Prep Time: 20 minutes
- Cook Time: 20 minutes
- Total Time: 40 minutes + cooling
- Yield: 12 cupcakes
- Category: Dessert
- Method: Baking
- Cuisine: American
- Diet: Vegetarian
Ingredients
- 1 1/2 cups all-purpose flour
- 2 tbsp cocoa powder
- 1 tsp baking powder
- 1/2 tsp baking soda
- 1/4 tsp salt
- 1/2 cup (1 stick) butter, softened
- 1 cup sugar
- 2 large eggs
- 2 tsp vanilla extract
- 3/4 cup buttermilk
- 1 tbsp red food coloring
- 1 tsp vinegar
- 8 oz cream cheese, softened (for frosting)
- 1/4 cup butter, softened (for frosting)
- 2 cups powdered sugar (for frosting)
- 1 tsp vanilla extract (for frosting)
Instructions
- Preheat oven to 350°F (175°C). Line a muffin tin with 12 cupcake liners.
- Whisk together flour, cocoa powder, baking powder, baking soda, and salt in a bowl.
- In a separate bowl, cream butter and sugar until light and fluffy. Beat in eggs and vanilla.
- Mix in dry ingredients alternately with buttermilk until batter is smooth. Divide batter evenly into two bowls.
- To one half, stir in red food coloring, cocoa, and vinegar to create the red velvet portion.
- Spoon alternating dollops of red velvet and plain batter into cupcake liners. Swirl gently with a toothpick for a marbled effect.
- Bake for 18–20 minutes, until a toothpick comes out clean. Cool completely before frosting.
- For frosting: Beat cream cheese and butter until smooth. Add powdered sugar and vanilla, beating until fluffy. Frost cooled cupcakes and serve.
Notes
- Add chocolate chips to the batter for extra richness.
- Use chocolate batter instead of plain vanilla for a deeper marble contrast.
- Top with sprinkles or a drizzle of melted white chocolate for a festive touch.
- Store frosted cupcakes in the fridge up to 4 days; bring to room temp before serving.
- Unfrosted cupcakes can be stored at room temp for 2 days or frozen up to 2 months.
Nutrition
- Serving Size: 1 cupcake
- Calories: 280
- Sugar: 24g
- Sodium: 210mg
- Fat: 14g
- Saturated Fat: 8g
- Unsaturated Fat: 5g
- Trans Fat: 0g
- Carbohydrates: 35g
- Fiber: 1g
- Protein: 4g
- Cholesterol: 55mg

